Sunday, March 12, 2017

Get Started With Linux Operating System

What is Linux..??

Linux is a high performance, yet completely free operating system that closely resembles UNIX. An operating system is the main software that operates on a computer.

UNIX was originally developed by Ken Thompson and Dennis Ritchie at Bell Labs, the legendary research arm of AT&T (the former U.S. telecommunications monopoly) in 1969 and was substantially improved at the University of California at Berkeley (UCB) during the 1970s and 1980s. Many variations were subsequently developed, and they are collectively referred to as Unix-like operating systems. Unix-like operating systems are widely regarded as the best operating systems ever created in terms of several criteria, including stability, security, flexibility, scalability and elegance.


Linux was started in 1991 by Linus Torvalds, then a student at the University of Helsinki in Finland, because of his dissatisfaction with MS-DOS and his desire to obtain a free version of UNIX for his new computer. Linux quickly became a global project with programmers from around the world participating in its development via the Internet. Its performance has improved continuously, and this has been paralleled by the swift growth in its usage around the world by individuals, corporations, educational institutions and governments.

Linux is superior to other Unix-like operating systems in several respects. One is that it is completely free, in contrast to the costly proprietary (i.e., commercial) versions of UNIX. It is free both in a monetary sense (i.e., that it can be obtained by anybody at no cost) and in the sense that anyone is permitted to use it for any purpose (including making as many copies as desired for personal or business use, using it on any number of computers, modifying it in any way desired, giving away copies of the original or modified versions, and even selling such copies for a profit!). Software that is free in all of these senses is referred to as free software or open source software.

This freedom is made possible by the fact that Linux is released under the GNU General Public License (GPL). The GNU project was begun by Richard Stallman in 1983 for the purpose of developing a completely free, high performance, Unix-like operating system. It has provided many of the most critical utility programs for Linux, and thus it is sometimes suggested that the most appropriate name for Linux is GNU/Linux.

Another advantage of Linux is that it can operate on a much wider range of hardware than most other operating systems. It can run on notebook computers, desktop computers, workstations, mainframes, supercomputers, handheld devices (including some cell phones), game machines, industrial robots and even a wristwatch!

Microsoft Windows is still the most widely used family of computer operating systems. However, Linux offers also some important advantages over them, and thus its worldwide growth rate is much faster. These advantages include the facts that (1) it is free, (2) it is extremely stable (i.e., it rarely crashes), (3) it is highly resistant to computer viruses, spyware and other malware, (4) a large amount of high quality, completely free application programs are available for use on it and (5) it can run on older computers that cannot accommodate the newer versions of Microsoft Windows.
    The different type of linux distributions
  1. Linux Mint
  2. Fedora
  3. Mandriva
  4. Arch
  5. Debian
  6. Fedora

Friday, January 27, 2017

Keyboard Shortcuts For Windows

keyboard shortcut for window

10 Keyboard Shortcuts For Windows Worth Remembering

The keyboard shortcuts for Windows abolish the need of dull mouse activities. If you’re well known about the keyboard shortcuts, you can actually lift your productivity to a new height. The most of the Windows users do not dare to know about them or ignore them for their little usability or awkward position in the keyboard. Here are some keyboard shortcuts for Windows worth remembering.


List of Keyboard Shortcuts For Windows


  1. WIN+E


    Windows Explorer is the most used Windows application in any Windows computer. It is needed whenever you want to locate any file or folder from your hard disk. The Windows Explorer can be accessed from the start menu, taskbar or desktop. If you double-click on any folder, it opens with the Windows Explorer.

    The common way to open Windows Explorer is double-clicking the “My Computer” icon from the desktop. But the easiest way to open Windows Explorer is using the keyboard shortcut. Simply, press Win + E from your keyboard and the Windows Explorer opens.

  2. Ctrl + Y


    One of the most used Keyboard shortcut in Windows is Ctrl + Z. Almost every user knows about this shortcut as it is used to undo any changes made when editing any document, text or image etc. But how much people do know about the shortcut Ctrl + Y? Probably not more! This keyboard shortcut is used to redo the task that is just undone. Some time, the consecutive application of this shortcut key reverts you back to the undone steps serially. This shortcut key may appear as life saver at various times – so it worth remembering.

  3. Shift + Ctrl + N


    Most of the users create new folder in Windows Explorer from the right-click context menu (Right-Click menu > New > Folder). A few number of users uses the “New Folder” item from the Windows explorer menu bar. But very few number of users in Windows does know about the shortcut way to create new folders in any location of Windows Explorer. It is Shift + Ctrl + N. Press this keyboard shortcut and a new folder will be created, waiting for renaming it.

  4. Win + Pause/Break


    There are various ways to learn about system details of a Windows computer. You can easily open it from the control panel or you can know about system information from command prompt. To know the command prompt tricks refer to this post. If you’re in Windows 8, opening the system details window is even easier. Just pres Win + X and select “System”.

    But what I found as the easiest way to open the system details box in Windows is the keyboard shortcut Win + Pause/Break. Just use this and the system details window will popup immediately.

  5. Alt + Tab


    The Alt + Tab shortcut key quickly helps you switch between the running programs in Windows. Pressing the key combination from your keyboard simultaneously takes you into the programs one-by-one. Just release the key when you want to enter into your preferred program.

  6. Win + Tab


    The Win + Tab shortcut key works as same as the Alt + Tab shortcut key but it adds more flavor to it. It switches between the running program with an amazing animation.

  7. Win + Arrow Keys


    There are many times when you need to switch back and forth between many applications. Why not you snap your running programs side-by-side into your desktop(large desktops are good for this)? Even you some time need to minimize some of the running programs. It is very painful job to move your hand towards mouse and keyboard too frequently. The Win + Arrow shortcut key can do it all easier for you and you don’t need to touch your mouse.

    1. Win + Left Arrow: This keyboard shortcut moves and then places the active program window to the left-half of the desktop screen.
    2. Win + Right Arrow: This keyboard shortcut moves and then places the active program window to the right-half of the desktop screen.
    3. Win + Up Arrow: This shortcut maximizes any snapped window.
    4. Win + Down Arrow: This restores down any maximized window.

  8. Alt + Print Screen


    You might be aware of Print Screen button. It silently takes the snapshot of the entire desktop and copies the snapshot at the clipboard. You can then paste it into Paint and save the snapshot as image. The same thing is done by Alt + Print Screen but more specifically. It only takes the snapshot of the the active window.

  9. ALT+ENTER


    ALT+ENTER: shorcut is display the properties of any file/folder. so you don't to right click on that folder/file to know its properties ,just select the folder/file and hit ALT+ENTER ...there u go

Saturday, April 9, 2016

watch vedio as your screen wallpaper


How To Watch Video As Your Screen Wallpaper

Today In My this article i,m going to share with you how to watch videos as a Desktop screen wallpaper.This is an amazing trick.This trick is working on any type of window Like-Windows XP, Window7,8 And Vista And Every Window in which VLC Media is worked.It Will be done by following these simple steps

1) Open Your VLC Media player if you don’t have VLC Media player then download it from here. Download Free VLC Media Player Here  http://www.videolan.org

2) After install Go to Toools > Preference or Simply Press Ctrl+P And Select Video from left pannel

3) Now Choose “directx video output” from output drop down list as shown in below figure

Watch-Video-Screen

4) Save your changes and restart VLC Media player

5) Play any video you would like to watch as your desktop screen wallpaper

6) Now click on video and select “directx wallpaper” from drop down list as shown in below figure

Video-Screen-Wallpaper

7) Now Minimize your VLC Media playeer and let’s start watch your video as desktop screen wallpaper

Note That:
if You want you default wallpaper back then Uncheck “directx wallpaper” from video drop down list 

enjoyyyy....

how to create your run commands on your computer


Create Your Own Run Commands By Simple Method

Today i am going to show you How To Create Of Your Own Run Commands On Your Computer

On the Microsoft Windows operating system, the Run command is used to directly open an application or document whose path is known. It functions more or less like a single-line command line interface. In the GNOME interface, the Run command is used to run applications via terminal commands.


Step 1. The first step is to select the software or application for which you want to make custom Run command. For example, let us consider Google Chrome as the example here. Remember, you can choose any application other than which is already there in the Run command.
Step 2. In the second step, right click on the desktop of your computer system and make a new shortcut.
Right click > New > Shortcut

Step 3. As you select the Shortcut option in the 2nd Step, it will open up a dialog box. And, the dialog box will ask you path of the application or software for which you want to create the Run command.
Step 4. Now, you need to browse through the files and choose the one that shows “chrome.exe”. Well, it is quite obvious that all the executable files can be found in the C drive (or wherever the Operating System has been installed), inside the folder “Program Files”. For example, “C:Program Files>Google Chrome>chrome.exe
Step 5. Once you are done with Step number 4, just click on “Next” button and simply provide a relative name to that shortcut. Remember, the same name will be used later in the Run command.
For example, “GC” for Google Chrome


Step 6. Now, click on the “Finish” button. Once it is done, an icon related to that application or software will show up on your computer’s screen. It means that the process of creating shortcut has been done successfully.
Step 7. In this step, just cut and paste that recently made shortcut icon into your computer’s root drive, in its Windows folder.
For example, C: Windows , Make sure you are the administrator of the computer or have its password.
Step 8. Now, you are done with the set up and can run the application through Run Command. Just go to Run and enter the keyword “GC”, and Google Chrome will begin executing.
So this was a Short but Usefull Tutorial to Create Run Commands for any software in windows,

I Hope this Post will Easeup your Work and saves your time, Stay Tuned and Subscribe to this blog


enjoyy.......

Top 6 WebsitesTo Learn Computer Programming Languages


Every wanted to learn computer programming languages, but didn't know where to start? Well, those days are over. Today learning programming languages is not really a hard job. If you are a beginner and have aptitude to learn computer programming then you can accomplish this goal within a few months. Here are the top 6 websites, which are useful for learning programming.

1. W3schools.com

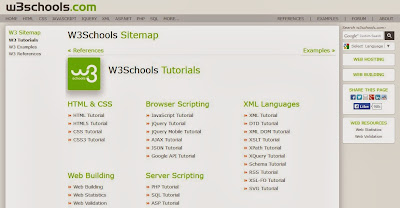
If you are a beginner or intermediate programmer, then w3schools is an excellent website for learning programming. W3schools offer tutorials for a variety of web programming and scripting languages such as html, html5, css, asp, Ajax, JavaScript, php, jQuery etc. So, if you are into web development then w3schools would be a great learning resource.
Learn Computer Programming

2. Codeavengers.com:

If you want learn coding for making games, apps or websites using html/html5, css3, JavaScript python, but want an entertaining teaching resource. Then codeavengers.com is ideal choice for you. Codeavengers.com was designed by keeping difficulty for beginners in mind. It provides a fun and interactive learning environment that is effective for all age groups. Even if you are an intermediate programmer, you might find some great learning stuff there.

Learn Computer Programming

3. Codecademy.com

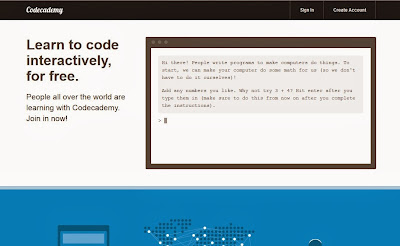
Codeacademy is another great website, for learning languages like JavaScript, HTML/CSS, PHP, Python, and Ruby. You can even learn how to use some popular web APIs in your website or app.  Codeacademy has a great modern learning system, which is based on user interaction. It has full-fledged programming courses for beginners. Again, this website is great for beginners and intermediate learners. But advanced programmers can also find some pretty useful stuff there.

Learn Computer Programming

4. tutorialspoint.com

Tutorialspoint has tutorials for a lot of web, high level and scripting languages that are commonly used today. You can find tutorials for any computer language that you have ever heard of (those that are currently in used). Apart from that, it also features a variety of tutorials for other fields such as DIP, OS, SEO, Telecom, DBMS, and frameworks etc.  Some commonly used languages that you can learn there are: Java, C++, PHP, Python, Ruby, C#, Perl, VB.Net, ios.

Learn Computer Programming

5. msdn.microsoft.com

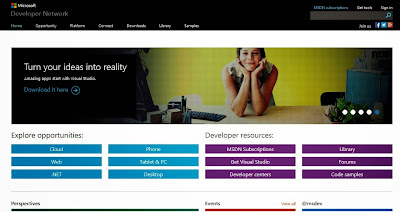
Although, beginner programmers might find MSDN (Microsoft Developer Network) a tough learning resource, it is still the best resource you can get, if you want to master Microsoft oriented languages such as VB.Net, C# etc. MSDN has great tutorials for beginners, intermediate and advance programmers.
Learn Computer Programming

But as I stated earlier, beginners might not be initially comfortable with MDSN, as I has really a lot of resources that it would be a hard time for beginners to find what they are looking for. But if you get used to MSDN, then it is the ideal learning point for Microsoft oriented languages. You can get a lot of sample applications, tutorials and resources that are uploaded by Microsoft and MSDN community. Since it’s a developer’s network, you can even find development help from community members.

6. Lynda.com

You might already know about Lynda.com. Lynda offers easy to follow video tutorials. Lynda.com is an old and well established tutoring site, if you are looking for video tutorials to learn computer languages, then Lynda is your ideal choice. Apart from programming languages, Lynda also offers tutorials for a variety of other fields such as 3D modeling, CAD, Photography etc. Lynda.com is an old and well established tutoring site.

Learn Computer Programming


So the next time someone asks you about your computer skills, you know where to turn. I hope you will learn a lot from these websites. All the best :)